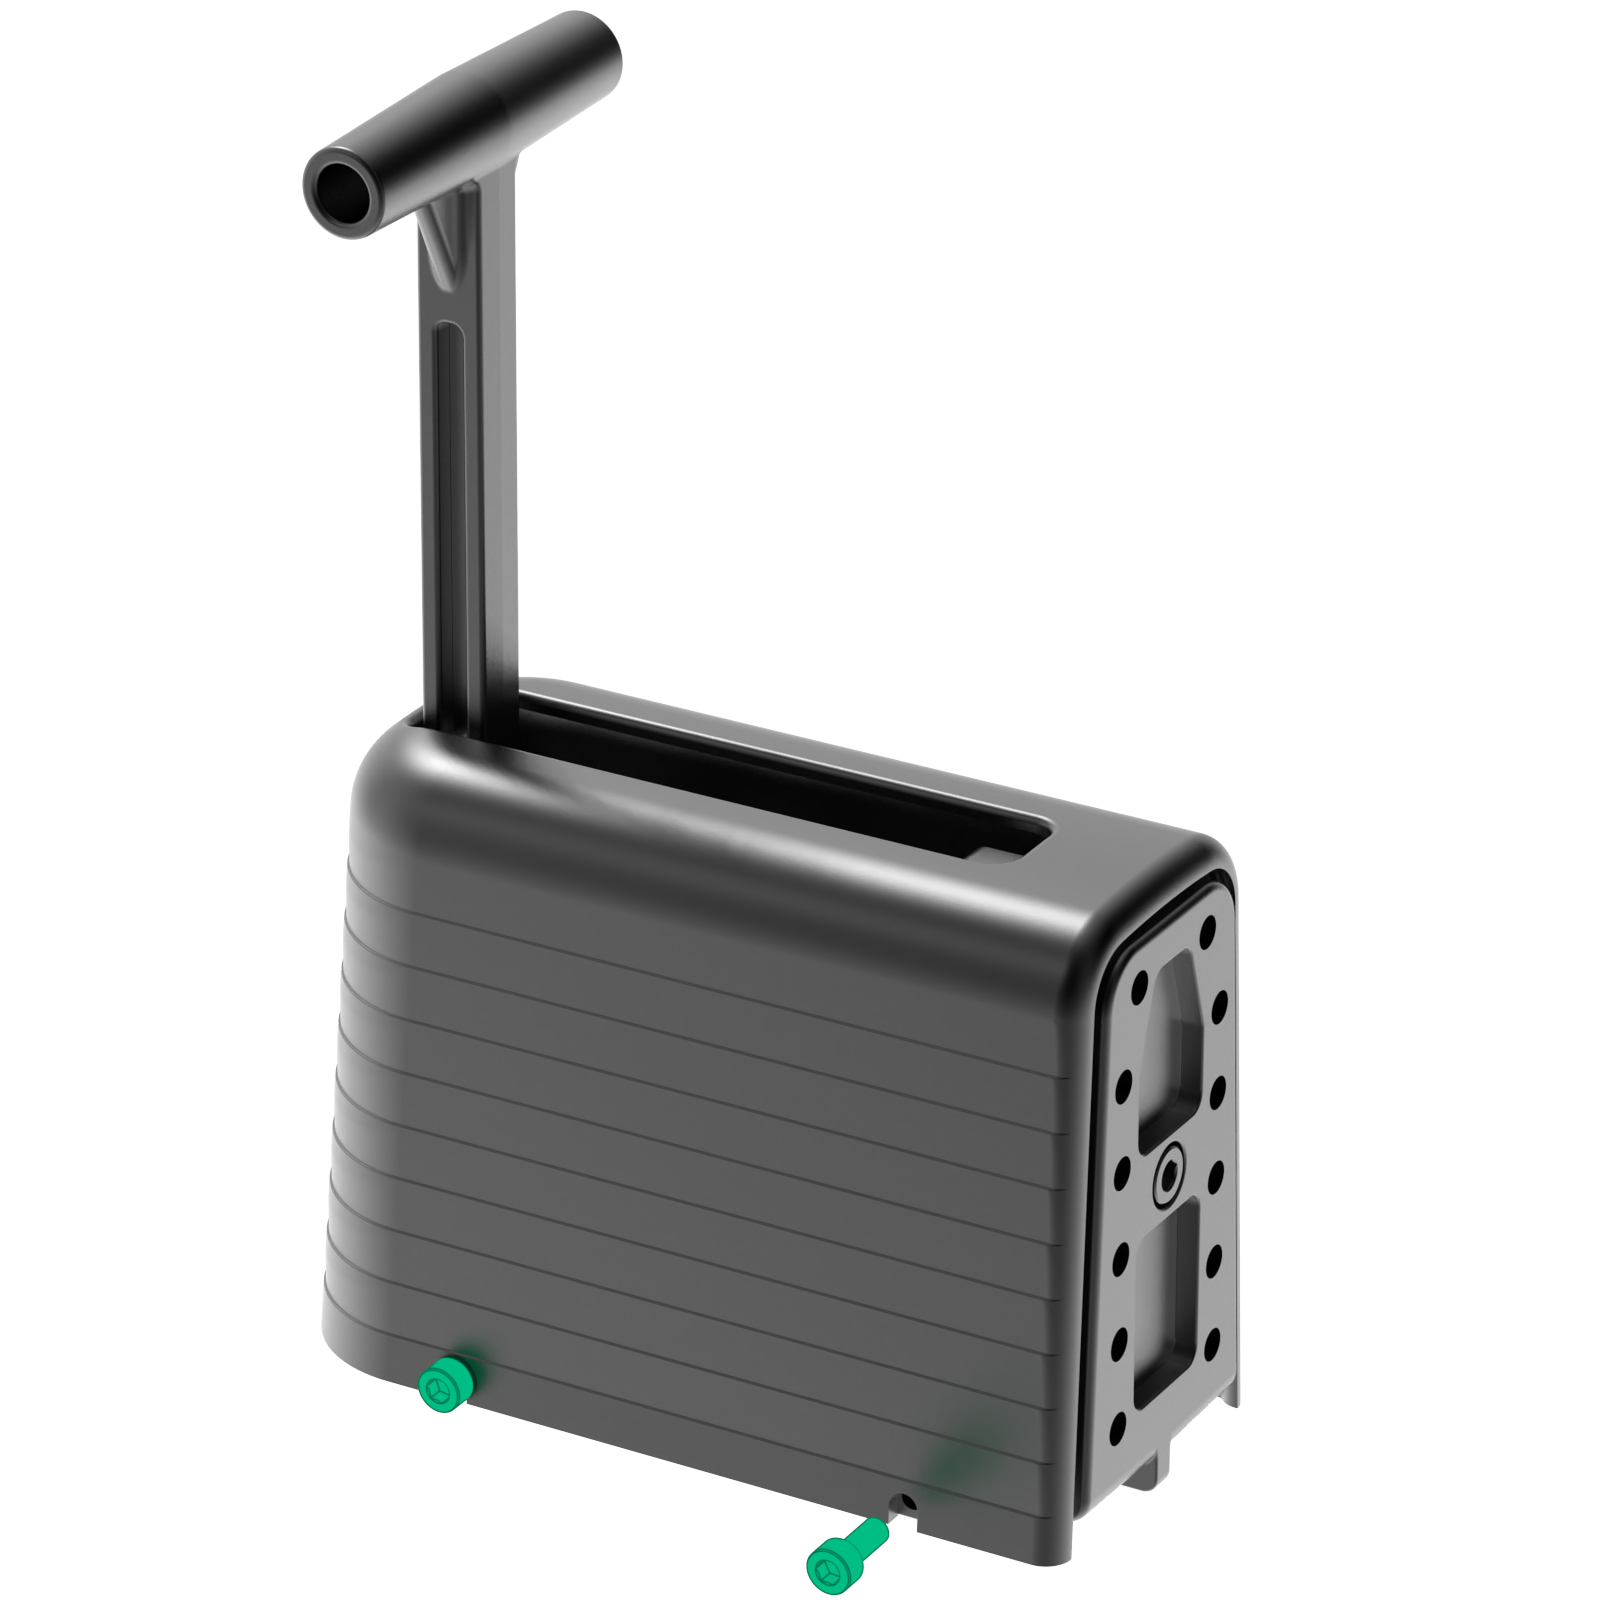
Loosen 4 Shroud Screws (1) and remove Shroud (2) (Lever (3) must be in up position to remove/install shroud). Route outer/inner cables from Clip Buddy units (with CLM-4CBL-BUD installed) to the CLM-RA12-BUD with 6” radius preferred (4” min) with smooth corners and no kinks. Secure cables well to prevent motion during use.
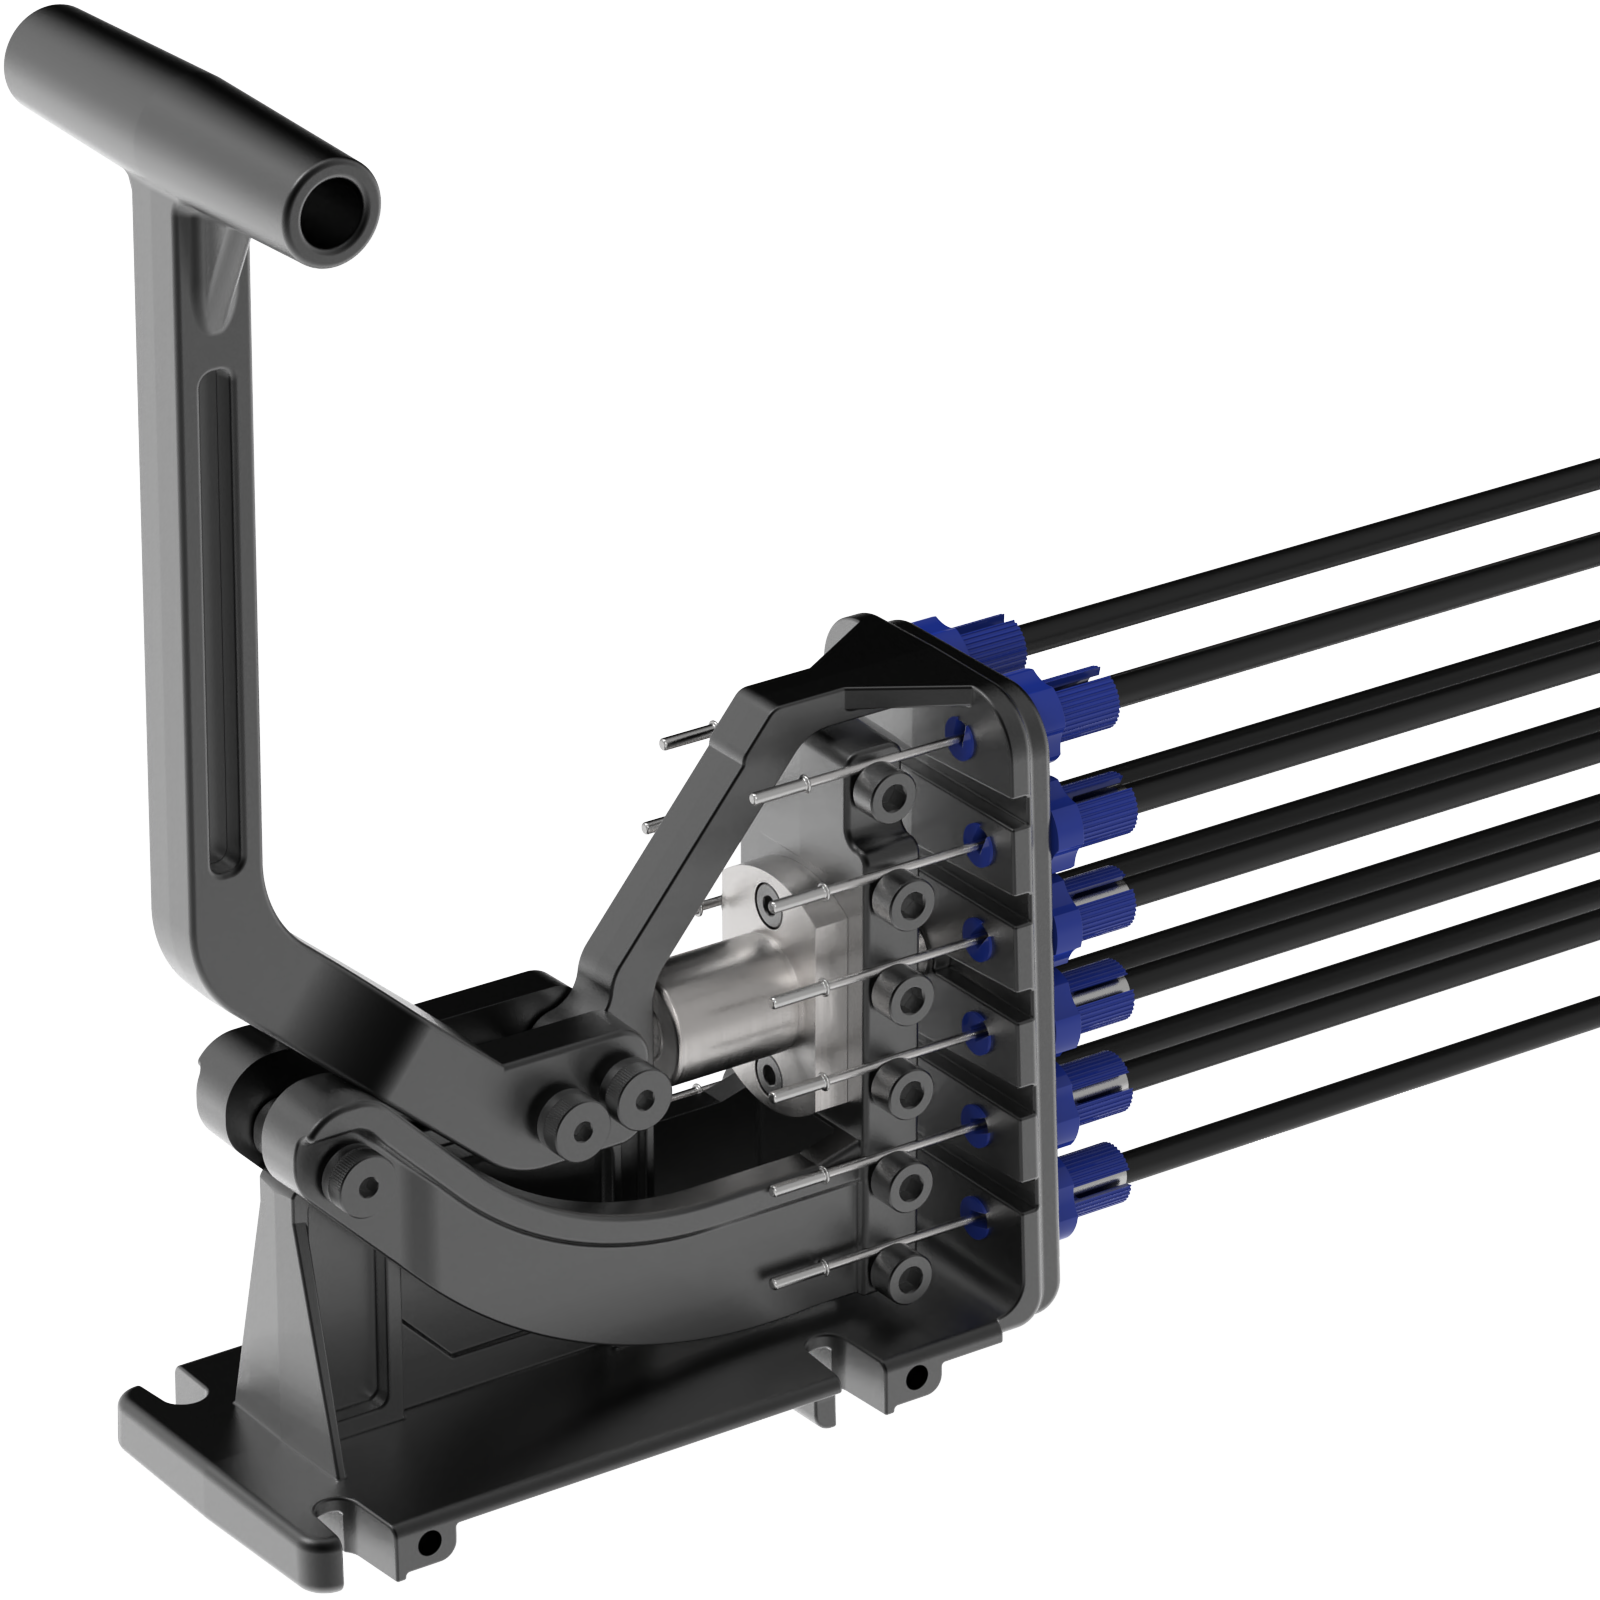
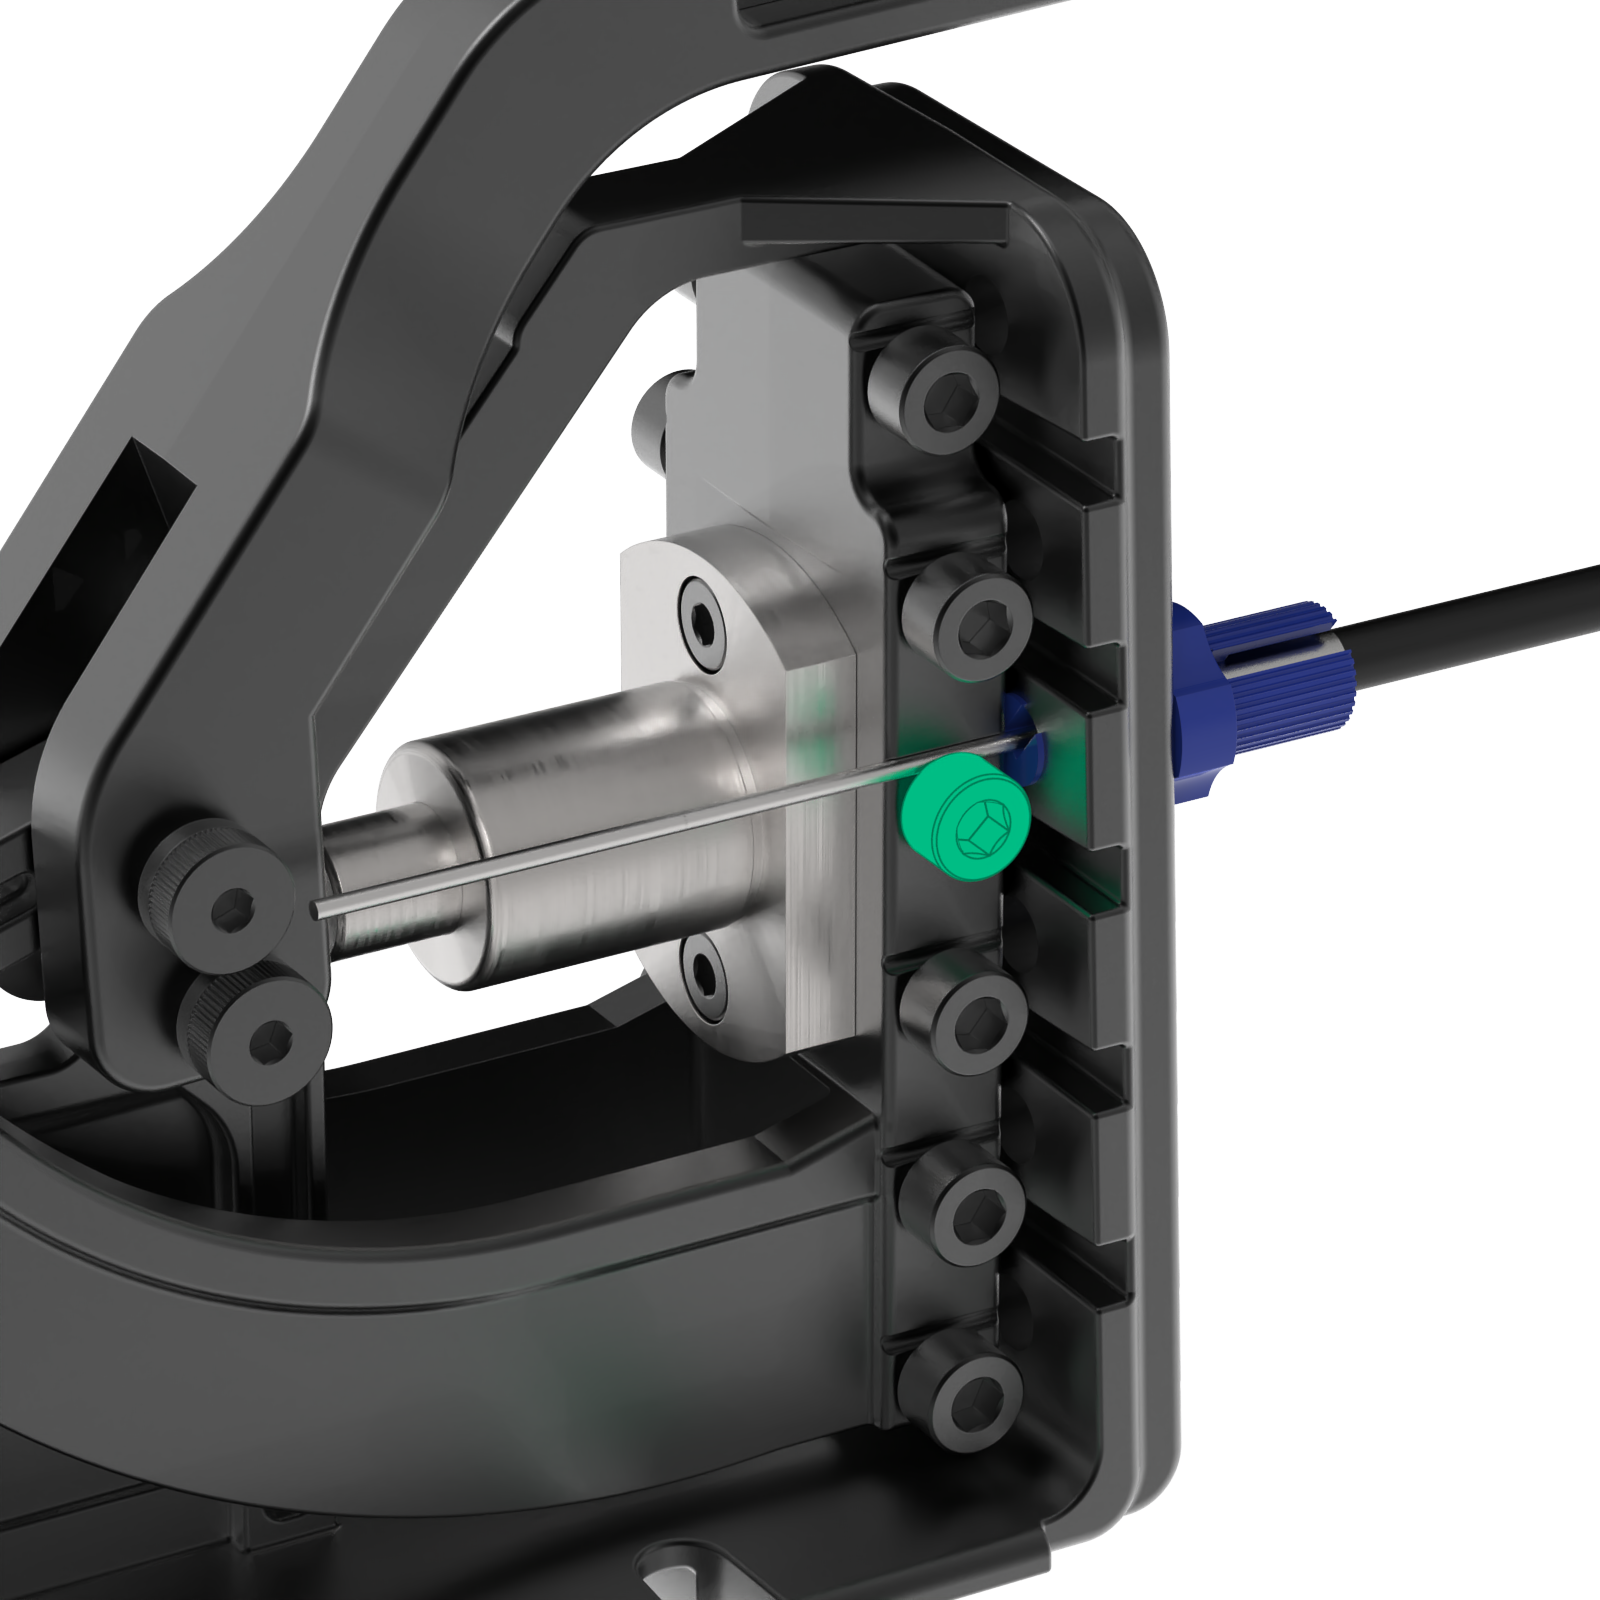
Cut Outer Cable (8) to length and re-install silver Outer Cable Ends (9). With Lever (3) down, install the cable length Adjusters (5) (screwed short) into the CLM-RA12-BUD, and bring all Inner Cables (7) through Adjusters (5) and into radius grooves under Washer Screws (6). When fewer than 12 cables are used, center installation holes are preferred.
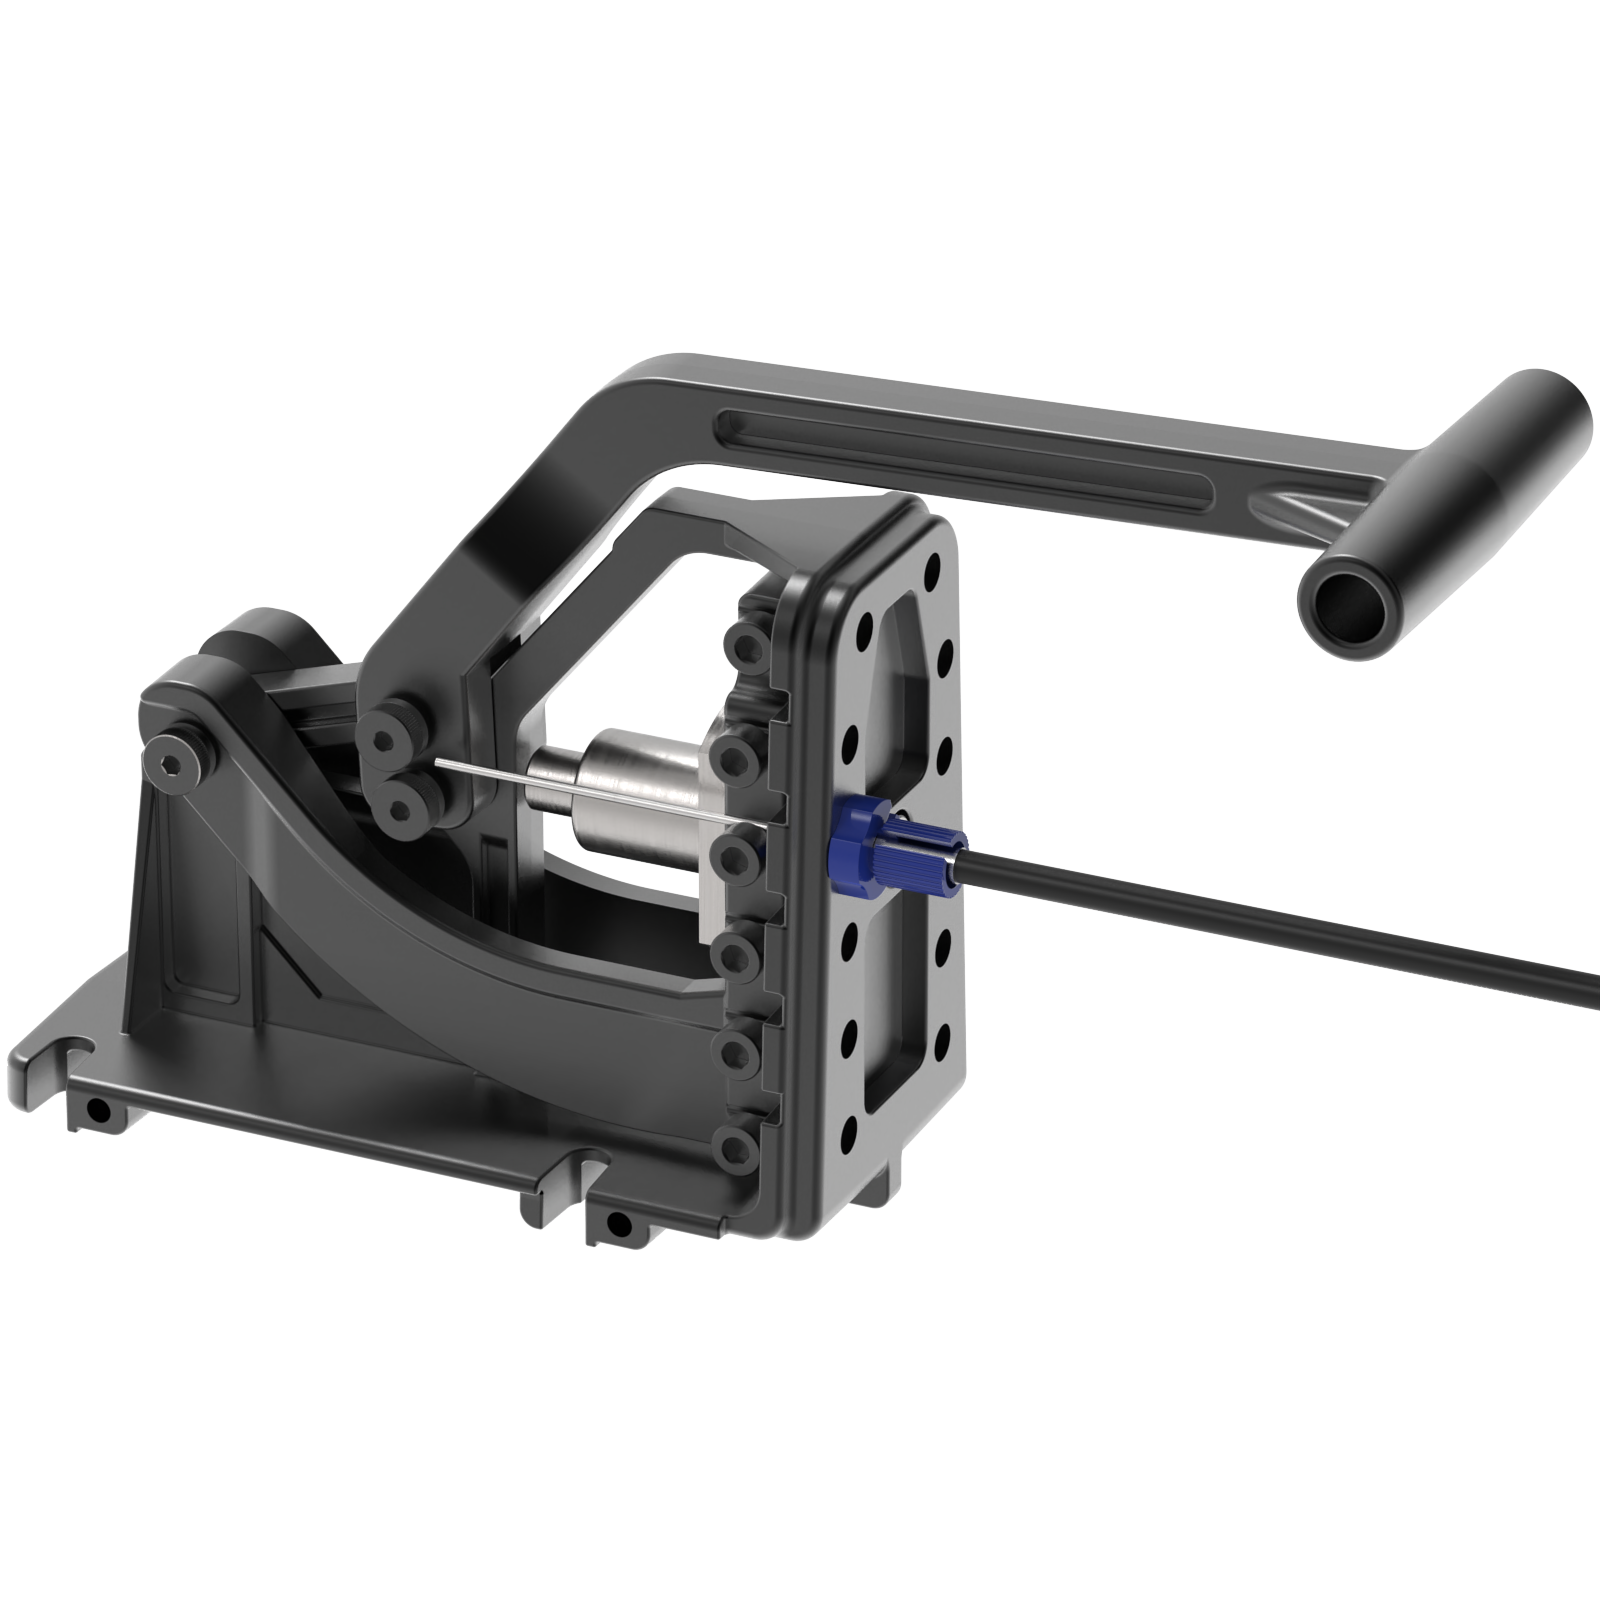
With Lever (3) down, pull Cables (7) to eliminate slack but not compressing the spring at the Clip Buddy. Tighten the Washer Screws (6).
After all cables are installed, adjust all cable length Adjusters (5) for proper and even functionality. With Lever (3) up, cut Inner Cables (7) to length and install Crimp Ends (10). Reinstall outer Shroud (2).